The current Standard format, up to Obsidian Flames, has spawned a very varied metagame. There are about a dozen decks that can be expected to win events: in no particular order, Gardevoir ex, Lost Zone Box, Arceus VSTAR / Giratina VSTAR, Lugia VSTAR, Mew VMAX, Miraidon ex, Charizard ex, Chien-Pao ex / Baxcalibur, Rapid Strike Urshifu VMAX / Inteleon VMAX, and Palkia VSTAR / Chien-Pao ex are all viable archetypes. However, if you were to ask players which deck is the best, most of them would probably say Lost Zone Giratina VSTAR. I don’t think the deck is that much above its competition, and its certainly not a must-play, but it has no clear weakness and can beat anything in the format, due to its variety of attackers: Lost Impact and Star Requiem are incredible attacks to deal with opposing two-Prize and three-Prize Pokémon, while Sableye and Radiant Greninja can take multiple Prizes off of low-HP Pokémon. This non-linearity also means that there is a high-skill ceiling to the deck: while it’s not too hard to pick up, it’s not easy to master. All these factors make Giratina a great choice, whether you’re just trying to find a deck to improve your game or you’re aiming to win tournaments.
If you haven’t played for a while, this state of affairs may be surprising. After all, while Giratina enjoyed a lot of success upon its release, it was soon overshadowed by Lugia VSTAR, the clear best deck of the Silver Tempest format, which beat it pretty soundly. After rotation, Giratina suffered from the omnipresence of Lost Zone Box. After the Paldea Evolved release, though, the deck gained some important new cards in Super Rod and especially Jet Energy. It took some time for the player base to reevaluate Giratina in light of these new elements, despite the deck’s continued success in Japan, but we’ve now reached the point where Giratina VSTAR can be expected to be the most played deck at any event.
Luckily, this article is here to help you! I picked up Giratina VSTAR just after NAIC, and have been playing it almost exclusively for three months now. In this guide, I will explain how to build and play the deck, so you can be prepared for your next tournament, whether it’s a Regionals or a League Challenge.
Giratina VSTAR decklist
Here’s my current build of Giratina:
| Pokémon – 14 |
|---|
| 4 Comfey LOR 79 |
| 3 Giratina V LOR 130 |
| 3 Giratina VSTAR LOR 131 |
| 2 Sableye LOR 70 |
| 1 Radiant Greninja ASR 46 |
| 1 Cramorant LOR 50 |
| Trainer Cards – 32 |
|---|
| 4 Colress’s Experiment LOR 190 |
| 2 Boss’s Orders LOR-TG 24 |
| 2 Roxanne ASR 188 |
| 1 Iono PAL 254 |
| 4 Battle VIP Pass FST 225 |
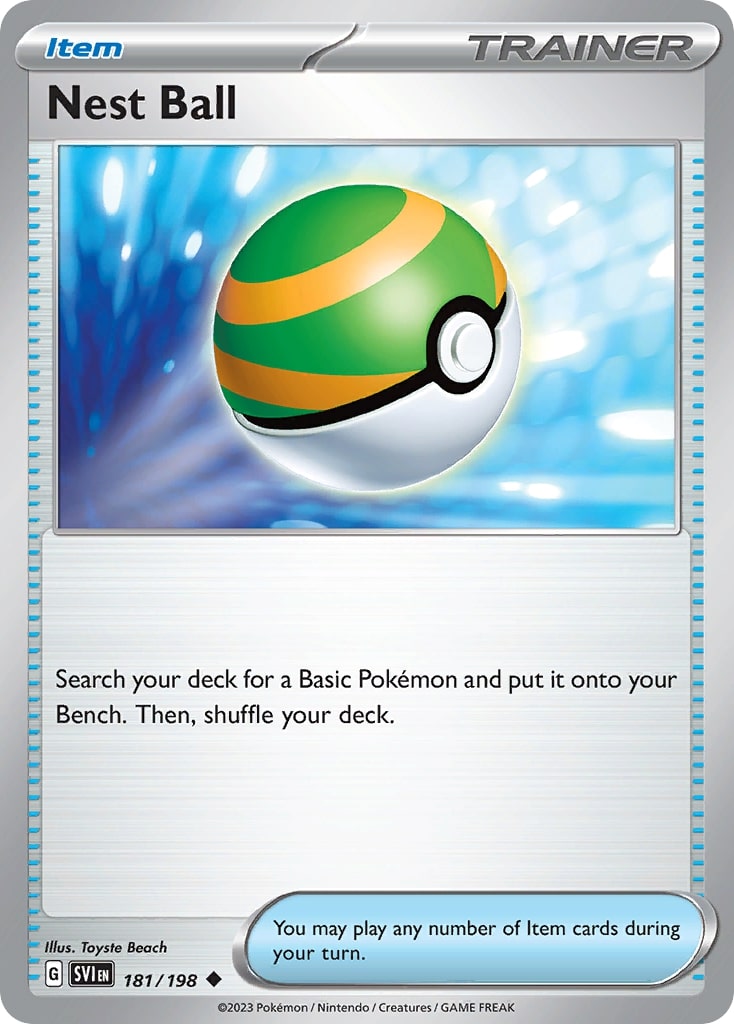
| 3 Nest Ball SVI 181 |
| 4 Mirage Gate LOR 163 |
| 3 Switch Cart ASR 154 |
| 2 Escape Rope BST 125 |
| 2 Super Rod PAL 188 |
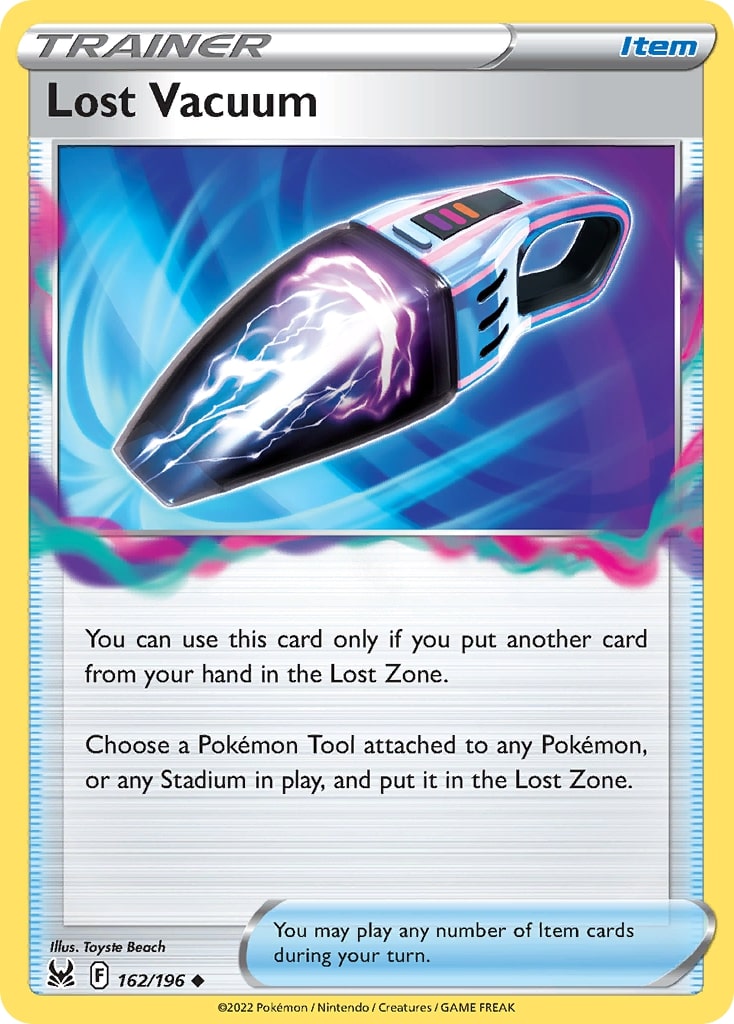
| 1 Lost Vacuum LOR 162 |
| 4 Path to the Peak CRE 148 |
| Energy – 14 |
|---|
| 4 Basic {P} Energy Energy 22 |
| 3 Basic {G} Energy Energy 18 |
| 3 Basic {W} Energy Energy 20 |
| 4 Jet Energy PAL 190 |
To be clear, this is hardly some original innovation on my part: I’m just playing, and recommending, something that works. The general shape of the deck (like the Sableye-Cramorant split, the Supporter line, the 2 Super Rod, etc.) was refined by Japanese players in the months they played the Paldea Evolved format before that set was released in the West. The fourth Jet Energy was rarely seen in Japanese lists, but has become a mainstay in Giratina ever since Henry Brand picked up the deck for NAIC. My main choices are to play four Path to the Peak (which was seen in some other decklists as well, including Akira Sato’s, who made the top 16 at the World Championships) and to include a Lost Vacuum.
Let me explain some of the choices in this list that seem the most relevant based on the questions I regularly get asked. If you understand the role of each card, you understand how the deck is played.
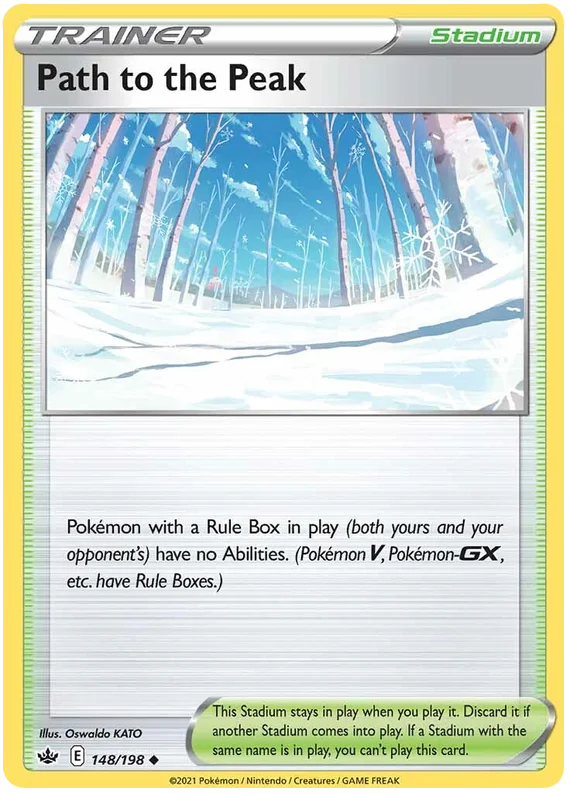
4 Path to the Peak: This Stadium is extremely good in the metagame right now, and Giratina VSTAR is barely affected by it, so it’s one of the best decks to play four Path in. If you look at the metagame, you’ll notice that almost deck other than Giratina can struggle with Path to the Peak. It can slow down Lugia VSTAR and Arceus VSTAR decks early on by denying them their VSTAR Powers, it’s a great card in the late game against Gardevoir ex, and it’s good all game long against the newcomer, Charizard ex.
This all makes Path to the Peak a strong choice, but the main reason to play four copies is for the Chien-Pao ex / Baxcalibur matchup. This matchup can be difficult because, like Giratina, Chien-Pao ex decks can attack from multiple angles: taking multiple KOs at once with Radiant Greninja, or using Chien-Pao ex’s Hail Blade to OHKO any Pokémon. With good draws, that deck can beat anything. However, Path to the Peak removes Chien-Pao ex’s, Radiant Greninja’s, and Palkia VSTAR’s (or Arceus VSTAR’s) Abilities, making the deck extremely clunky. By playing four copies, we maximise our odds of drawing one on the first turn. If we can keep that Stadium in play all game long, we basically make it impossible for the opponent to win.
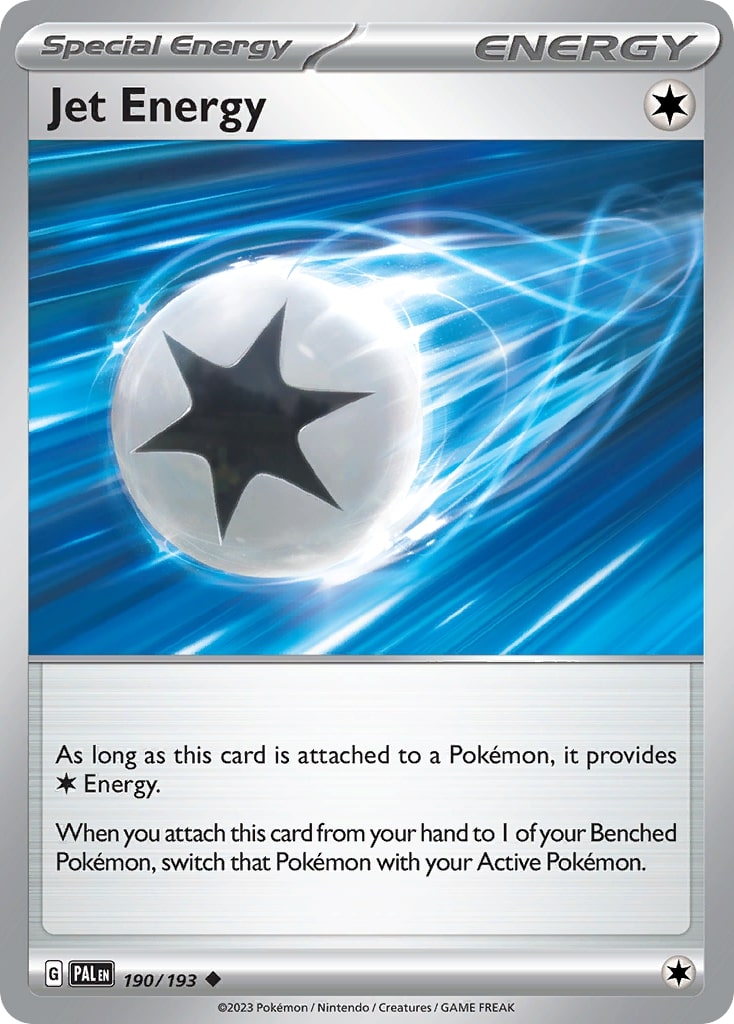
4 Jet Energy: Jet Energy is a fantastic card in Giratina, much more than in other Lost Zone decks, for three reasons.
First, it can be used to power up Giratina V’s Abyss Seeking. This attack is a key part of Giratina’s strategy. In many matchups, using Abyss Seeking early on is a great alternative to, or even better than, attacking with Cramorant, because it fills your Lost Zone. Getting to seven cards in the Lost Zone has a higher payoff in Giratina than in other decks, because you become able to either deal a massive 280 damage with Lost Impact, or use Moonlight Shuriken to take two KOs on small targets (Comfey, Kirlia, etc.). With ten cards in the Lost Zone, you can either use Sableye’s Lost Mine or Star Requiem, two extremely powerful attacks. Being able to use these attacks earlier is a good payoff for sacrificing one turn of attacking. For example, against Gardevoir ex, it’s much better to use Abyss Seeking and race towards being able to put ten cards in the discard, than to use Cramorant to take out Mew. Abyss Seeking is particularly good against decks that can’t really threaten you on turn 2, like Arceus VSTAR.
Second, Jet Energy gives the deck an easy way to use three Flower Selecting in one turn. Against decks that can KO a Giratina V on turn 2 (notably Lugia VSTAR), using Abyss Seeking is very dangerous. Instead, it’s much better to fill the Lost Zone in the traditional way, by using multiple Comfey (and, of course, Colress’s Experiment). If you have three Comfey in play, you can use Flower Selecting, attach a Jet Energy to a second Comfey, bringing it active, use Flower Selecting again, then retreat to the third Comfey (discarding Jet Energy) and use a third Flower Selecting. This adds three cards to the Lost Zone (and draws three cards, of course), without using a single Switch Cart or Escape Rope. If you do this on turn 1, you can then easily get to seven cards in the Lost Zone on turn 2 by using two Flower Selecting and a Colress’s Experiment.
Finally, unlike many other attackers played in Lost Zone decks (like Dragonite V and Radiant Greninja), Giratina VSTAR can be powered up with a Mirage Gate and a Colorless Energy. Jet Energy is perfect to fill Lost Impact’s Colorless requirement. For example, following the turn 1 example above, you could use Colress’s Experiment and Flower Selecting on turn 2, a Switch Cart to bring another Comfey Active and use Flower Selecting again, going to seven cards in the Lost Zone. Finally, you can use Mirage Gate on Giratina VSTAR and attach a Jet Energy to bring it Active and use Lost Impact. This exact sequence of events isn’t that common, but variations on this kind of turn happen frequently when playing Giratina, and the deck would need more switching cards and more Energy to work if it didn’t have Jet Energy.
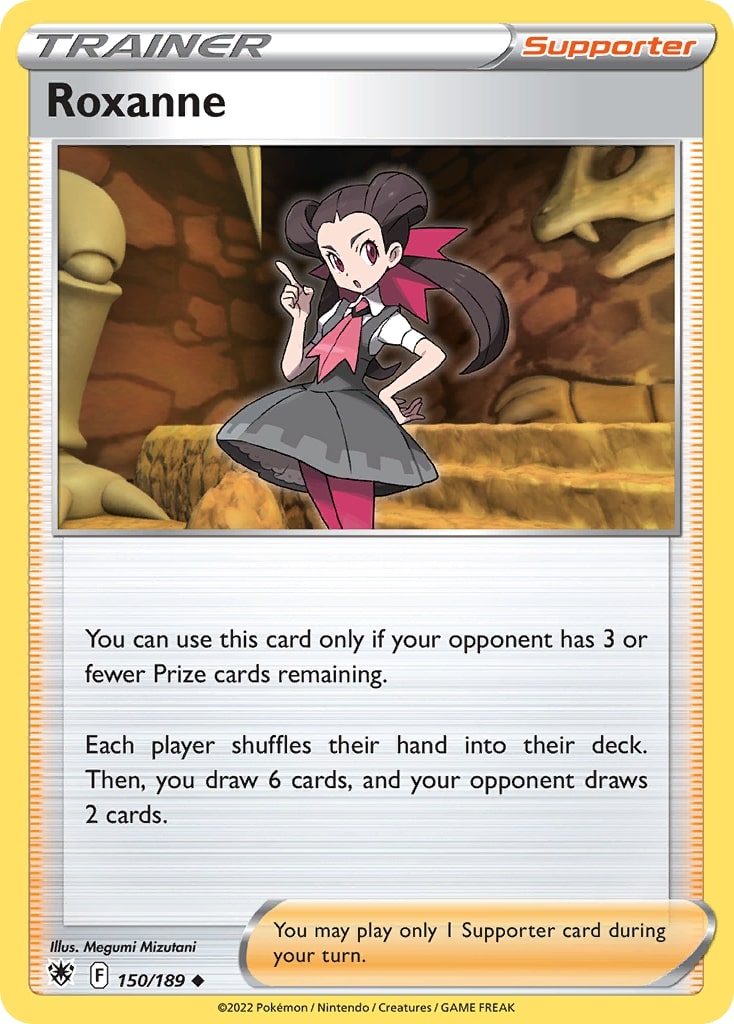
2 Roxanne, 1 Iono: I mentioned above how Abyss Seeking was an integral part of Giratina’s strategy. One reason for this is that Giratina can play the comeback game very well. Even if you end up a few Prizes behind your opponent because you used Abyss Seeking instead of taking early KOs, Roxanne gives you a powerful way to get back into the game, especially combined with Path to the Peak. This combination is great against Gardevoir ex, Chien-Pao ex (as long as Bibarel isn’t in play), Charizard ex, and more.
Lost Zone decks are also hurt a lot by Roxanne. Because of that, some of them may try to use Sableye to spread damage and avoid taking KOs beyond the second, aiming to take all four remaining Prizes in one turn, so that you can never play Roxanne. That’s where Iono shines, being able to still disrupt the opponent’s plans. Beyond that, Iono is also one more consistency card in the early game, and one more disruption card in the late game (though you’d rather play Roxanne if you can, because it draws you more cards).
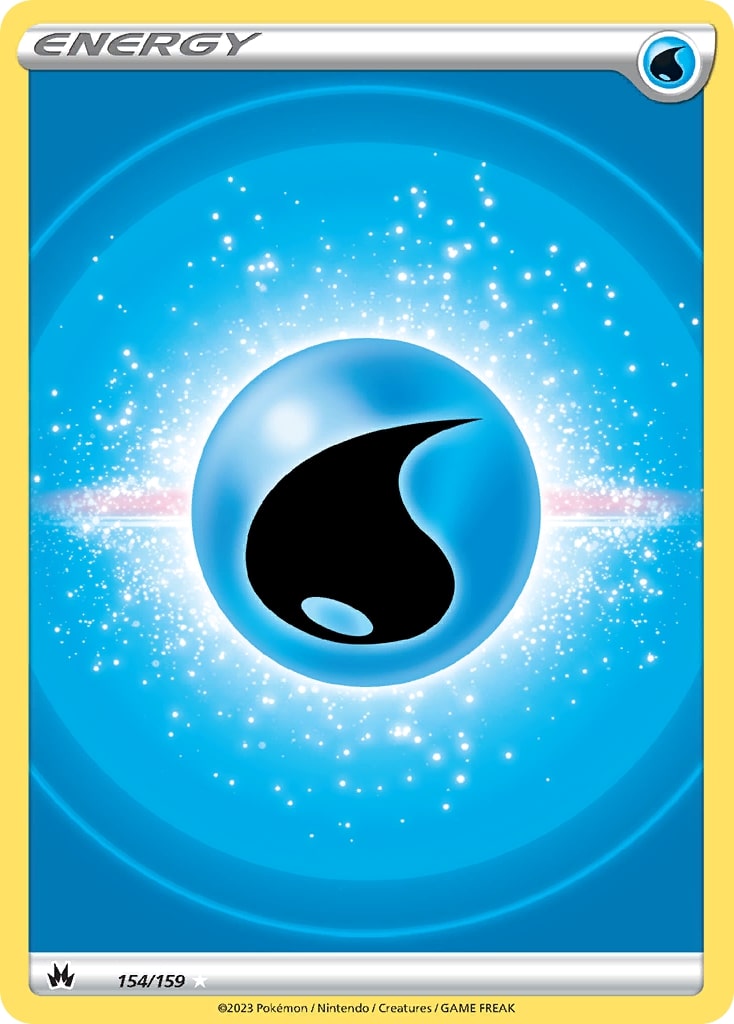
3 Water Energy: It’s actually rare to use Radiant Greninja’s attack in this deck. Most decks that would be affected by it play Manaphy, and we usually can’t get rid of it for good. Because of that, many Giratina players have started running fewer Water Energy, or even getting rid of them altogether. More Psychic and Grass Energy makes sense because it makes Energy management easier.
However, I believe that Water Energy are still very important to the deck. Even if you don’t end up using it, the threat of Moonlight Shuriken is extremely important. You want your opponent to commit a search card and a Bench spot to Manaphy. Against Gardevoir, for example, if you don’t have Water Energy, they can fill their Bench with Kirlia with Mirage Step, which is very dangerous for you. On the other hand, if they have to play Manaphy (and usually other Pokémon like Cresselia, Radiant Greninja, and Mew), they have very little space for actual Gardevoir lines, which means less draw power. Similarly, in the mirror match, if the opponent plays Manaphy alongside two Comfey, that gives you a path to drawing three Prize cards in two turns with Sableye.
1 Lost Vacuum: The one downside to running four Path to the Peak is that the card is useless in the Giratina mirror match. Lost Vacuum is a versatile card that gives Path to the Peak an utility in the mirror match: if you play Path to the Peak before the opponent, Lost Vacuum will get +2 cards in the Lost Zone. This can also let you use Mirage Gate or Lost Mine before the opponent expects it.
Beyond that, Lost Vacuum can find some random utility like removing an opponent’s Sky Seal Stone or Bravery Charm.
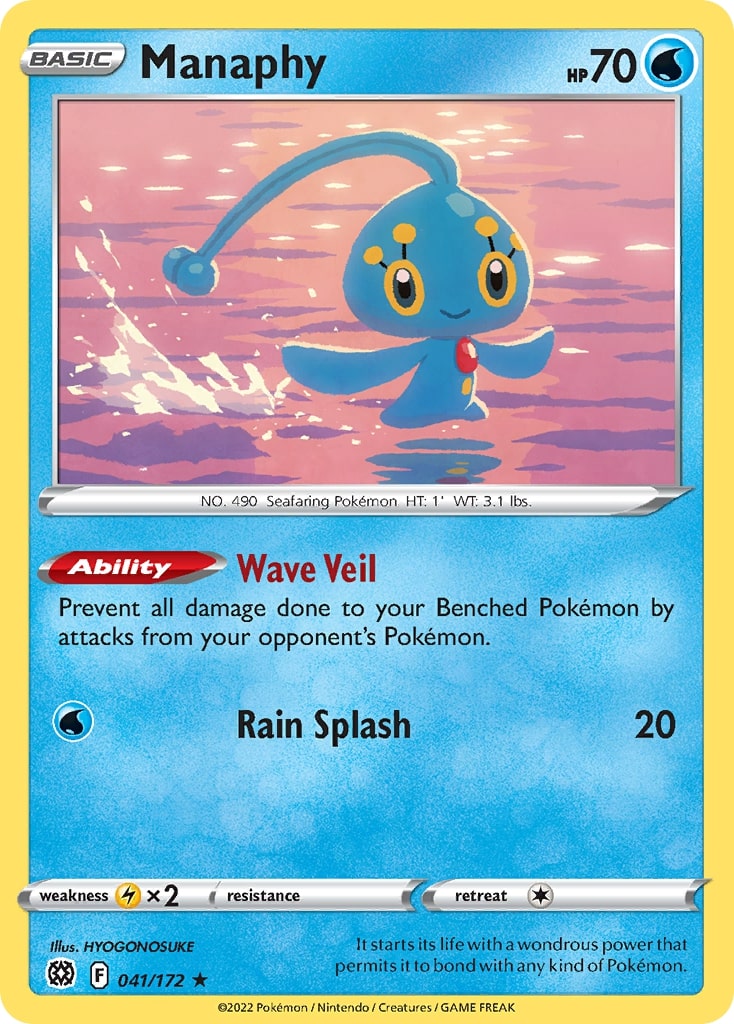
No Manaphy: By far the question I get asked the most about this deck is “why don’t you play Manaphy?”. To answer, let us first look at the decks that can attack the Bench, against which Manaphy can be useful. There are five main ones: Lost Box, Giratina VSTAR, Rapid Strike Urshifu VMAX, Chien-Pao ex / Baxcalibur, and Palkia VSTAR / Chien-Pao ex.
Against Rapid Strike Urshifu, Manaphy is a trap. The opponent will be putting damage on the field with Inteleon VMAX’s Double Gunner in order to prepare for Yoga Loop, which they basically always use before G-Max Rapid Flow. They will usually do this play on Comfey, but if you Bench Manaphy, they will target it instead. Manaphy will just have been one more target for the opponent and not have provided any protection.
The same goes for Lost Box: against that deck, you want to play as few low-HP targets as possible. You want your opponent to have to deal with your 280 HP Giratina VSTAR, rather than being able to win just by sniping small Pokémon with Sableye and Greninja. If you play Manaphy, that actually makes it easier for them to take six Prizes before you.
In the mirror match, things are a bit more complicated. The lack of Manaphy can sometimes be an issue, but there are many more factors that go into that matchup. For example, even a player with Manaphy can still run into issues because Sableye can take three Prizes off of two Comfey and Manaphy in two turns (you’d need two Switch Cart to prevent that). Given that Giratina VSTAR is usually the main factor in that matchup, I don’t think having Manaphy or not changes the matchup by that much.
Against Chien-Pao ex, Manaphy would certainly be useful to prevent a double KO on Comfey… except if the Chien-Pao player plays Cancelling Cologne, in which case, Manaphy won’t do anything except lure you into a false sense of security. This matchup can usually be played with only one Comfey to prevent that risk. Besides, Path to the Peak is the more important factor in that matchup anyway. The same goes for the Palkia VSTAR deck, except that this deck has much less Energy acceleration, so even when it can use Moonlight Shuriken for a double KO, that’s a big commitment that can hurt them in the long run.
Overall, while there are some uses for Manaphy, I have a hard time recommending it compared to many other cards.
Other options
I believe that the decklist above is close to optimal, but there are always some cards that can be switched around depending on your needs and the metagame you expect. The three most cuttable cards in the decklist above are Lost Vacuum, the fourth Path to the Peak, and the third Water Energy. I would only recommend cutting a Water Energy if you don’t expect a lot of Gardevoir, and cutting a Path to the Peak if you don’t expect a lot of Chien-Pao.
Here are some other cards to consider in the deck:
4th Nest Ball
I’ve tested a lot of techs to try to improve the Giratina mirror match: Manaphy, 2nd Cramorant, Hawlucha, 2nd Iono, Cancelling Cologne… each card can help in specific scenarios, but none of them had a noticeable effect overall, as most games aren’t so close that one of these techs will turn it around. Because of that, I’ve come to believe that the best thing to do is to maximise consistency, which obviously also helps in all other matchups. In the list above, I chose to run Lost Vacuum, which can be considered a consistency card in that it helps you fill your Lost Zone faster, which is one of the deck’s main objectives. However, I also like the fourth Nest Ball a lot in that spot, to increase your odds of getting a good start. Once the deck sets up, it usually doesn’t brick in the midgame, thanks to the power of Comfey.
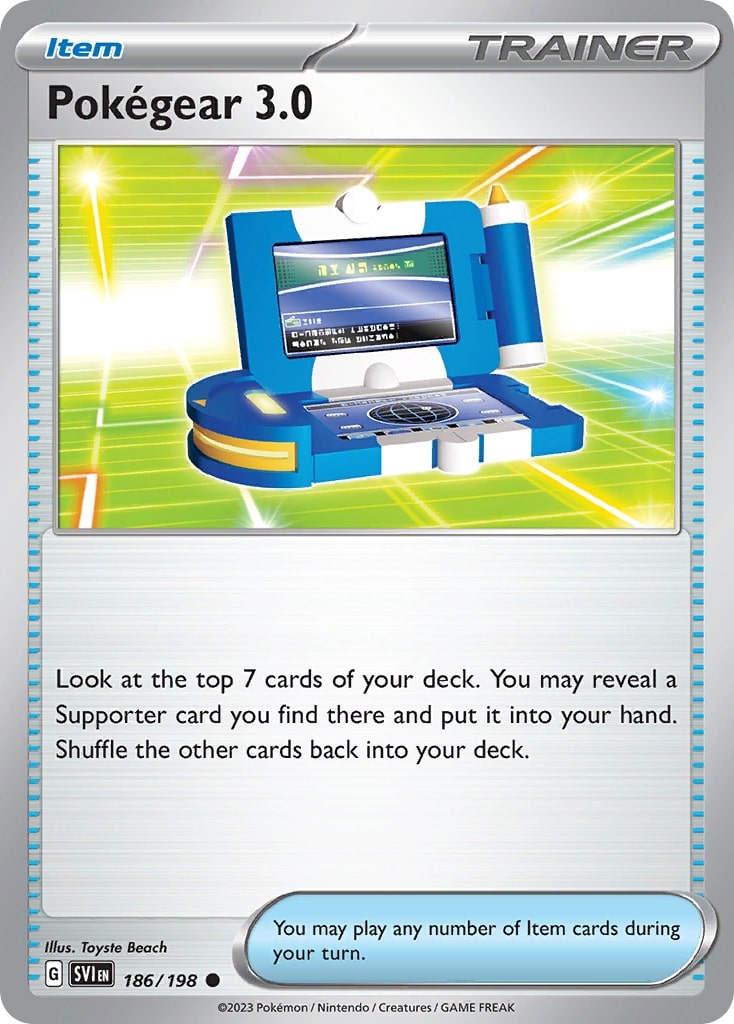
Pokégear 3.0
An alternative to the fourth Nest Ball, Pokégear can help you find Colress’s Experiment, the most important card in the deck. Its downsides are that it doesn’t do anything on the first turn if you go first, and that it’s generally unreliable. I like this card a lot in theory, but having tried it a lot, I’ve found that too often, it fails when I need it, which drove me away from it. It’s still a decent option, though.
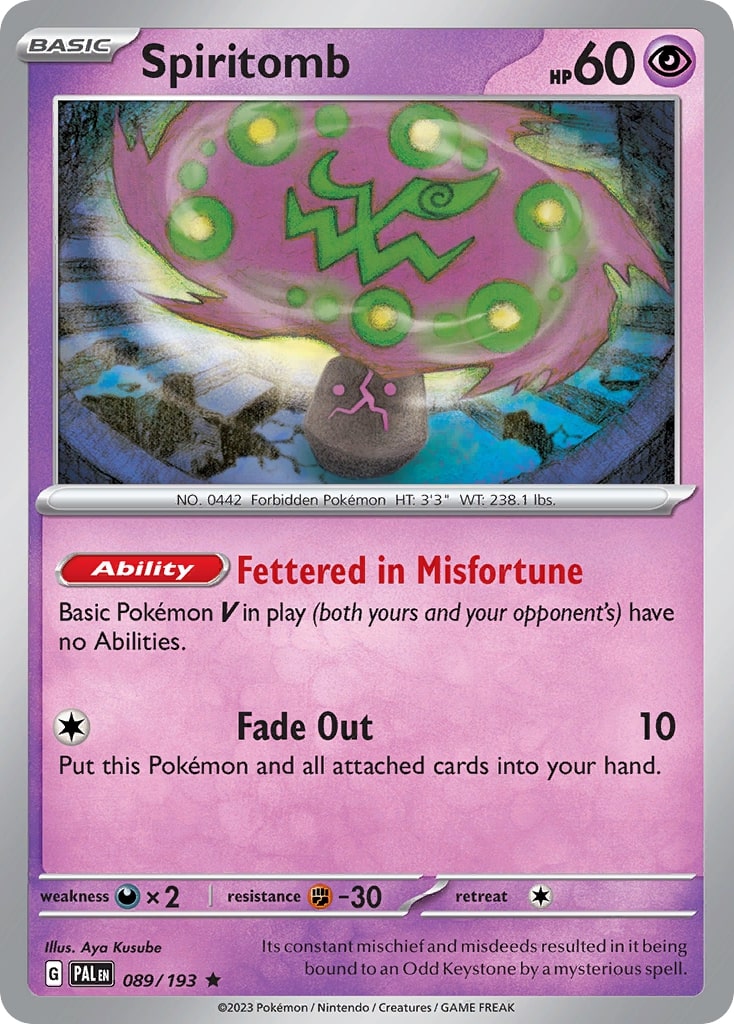
Spiritomb
Many people, myself included, have a tendency to underestimate the threat of Mew VMAX: “Oh, it won’t do well, people will play Spiritomb”. That fails to consider two things: first, many people will have the same reasoning and not play Spiritomb; second, Mew can still beat decks that run Spiritomb (though it’s, of course, harder). You might think that, having just won the World Championships, Mew VMAX will have a bigger target than ever on its face, but I thought the same after it won Japan’s National Championships, and yet, that didn’t stop it from winning Worlds.
Giratina VSTAR can certainly beat Mew, thanks to Path to the Peak. However, if the Mew player can prevent Path to the Peak from staying in play, that matchup gets much harder. Spiritomb helps a lot as it adds another layer of obstruction to Mew VMAX’s plan: it makes them have both a counter-Stadium and a Fusion Strike Energy on Genesect V to be able to use Fusion Strike System, and that can be very hard to find, even with a Forest Seal Stone.
Spiritomb can also be good against some other decks, notably Lugia VSTAR, which often relies on Lumineon V to find Professor Burnet in the early game. On the other hand, it’s a poor start against pretty much every other matchup, especially Lost Zone decks.
Temple of Sinnoh
This card is mainly a tech against the Single Strike version of Lugia VSTAR. Once Archeops is in play, Path to the Peak’s utility is lessened. However, the Temple of Sinnoh is incredible because it shuts down Gift Energy, V Guard Energy, and Single Strike Energy. Combine it with Roxanne, and you can completely prevent the Lugia VSTAR deck from attacking you in the late game. Temple of Sinnoh has minor applications in other matchups, such as letting you OHKO an Arceus VSTAR that has a V Guard Energy, but you can also keep Star Requiem for that purpose.
Choice Belt
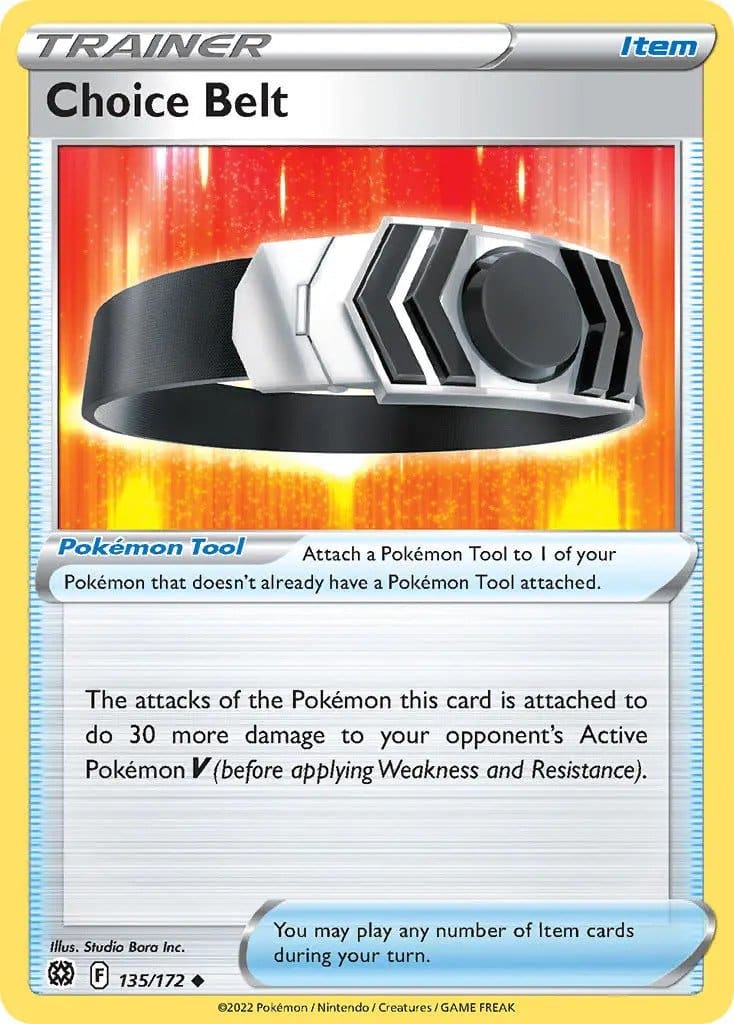
If you want a tech that’s a bit more versatile than Temple of Sinnoh or Spiritomb, you can consider Choice Belt, which Michael Pramawat included in his top 4 Worlds decklist. Choice Belt lets you KO a Pokémon VSTAR that has V Guard Energy, and it also helps against Mew VMAX because it lets Lost Impact reach 310 damage, thus giving Giratina a second way (after Star Requiem) to OHKO a Mew VMAX. Note that this only works if the Mew player doesn’t play Oricorio.
Manaphy
Despite all I wrote above, Manaphy can be a consideration in the deck. The main reason I would consider it is that it is important against the Lost Zone Kyogre matchup, which my decklist above struggles with. Currently, I consider this matchup rare enough that I’m willing to take the loss against it, but that might change in the future.
A note on Cross Switcher
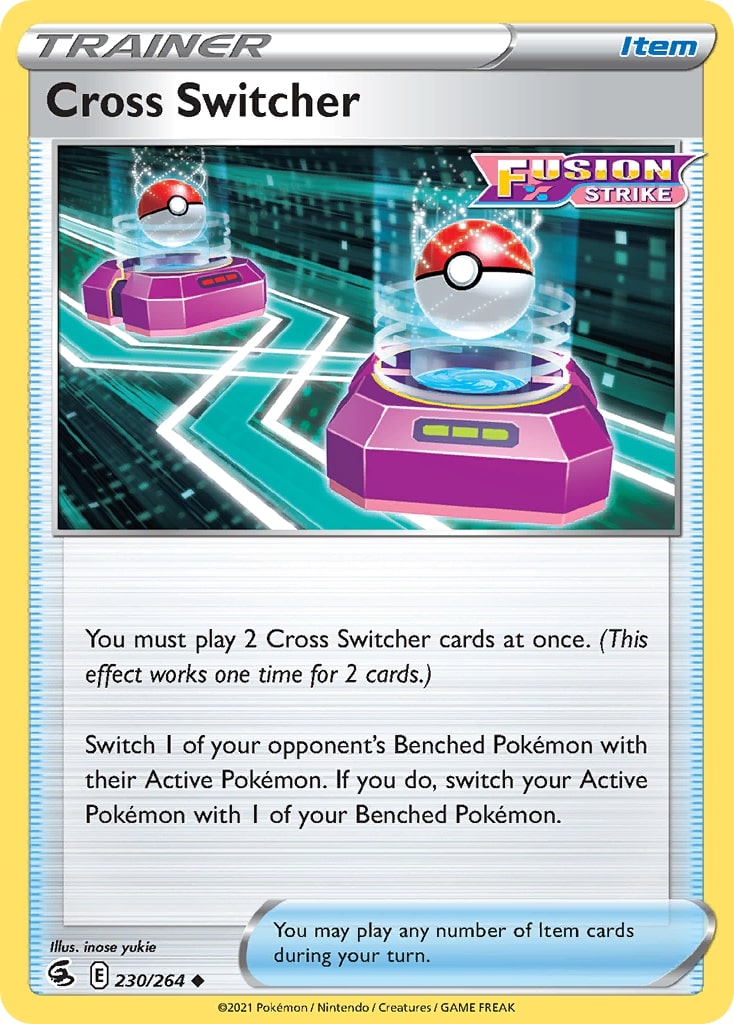
At the North America International Championships in June, Henry Brand created a new build of Giratina that ran Cross Switcher. With all the deck’s draw power, it’s not too hard to assemble a pair of Cross Switchers in hand, and this gives the deck, essentially, the power to use Boss’s Orders on the same turn as Colress’s Experiment (in the early game) or Roxanne (in the late game). Cross Switcher also provides the deck with more switching options.
The downside of Cross Switcher is that it takes a lot of deck space. It’s basically impossible to run four Path to the Peak and Cross Switcher in the same deck unless you make some strange cuts. It’s also a dead card in your opening hand (although to be fair, early Cross Switchers can be good with Cramorant to take a KO on a Bench sitter early on in the game).
The main reason to play Cross Switcher is that it improves the mirror match. I mentioned above that no single tech can swing the matchup significantly; Cross Switcher does have a noticeable effect, but it’s also a four-card commitment. It also doesn’t make the matchup an autowin either, as many games will still be decided by one player getting Colress’s Experiment in their opening hand and the other one not drawing any.
After a lot of hesitation, I ended up playing Cross Switchers in my Giratina list at Worlds. Overall, the Cross Switchers were decent, but not game-breaking. They’re certainly a viable option, especially if you expect a lot of Giratina, but right now, I would rather play a deck without them, and have space for four Path to the Peak and some other cards.
Conclusion
Thanks for reading! Giratina VSTAR is my favorite archetype to play in the current format, both because it’s extremely good and because it has a lot of options. The Lost Zone engine also forces you to make choices every single turn, and while some of these are easy, some of them to think a lot about how the game is likely to proceed in the next few turns. Giratina is also the deck that I’m the most likely to play for the Barcelona Special Event, though obviously, I haven’t chosen for sure yet. In any case, I hope this short guide helped you to understand some of the deck’s quirks! As always, if you have any feedback, don’t hesitate to let me know on Twitter! (@lubyllule)
Thanks,
Stéphane
